
This is the third article in a series which explores the SharePoint 2010 MySite features. This article will examine the ways that you can change the look and feel of the MySite. We’ll look at the ways you can modify the visual elements and also the techniques you can employ to apply custom branding such as masterpage and a custom theme.
Series contents:
- Overview, which details the MySite functionality provided by SP2010
- Anatomy, we delve inside the MySite and dissect its inner secrets
- Customisation for Branding, how to change the look and feel – This Article
- Customisation of My Content page, how to change the page layout and contents
- Customisation of a MySite Blog, how to alter the Blog
- The MySite centric intranet, putting the MySite at the centre of the universe
Global Navigation
One of the most common questions I’ve been asked by developers in my teams is ‘How do I apply the company logo to the MySite?’. Now you can go straight in and start whipping up a new masterpage to include the design changes, but there is a much similar way. The v4.master used on the MySite contains a little known ‘Delegate Control’ with the ID of ‘GlobalNavigation’. (This is around line 58 of the masterpage if viewing in SPD2010).
Those of you who saw my CKSDev presentations at either the UK or India SharePoint Saturday’ events would have seen me use this delegate to add the SPS logo to all the site headers.
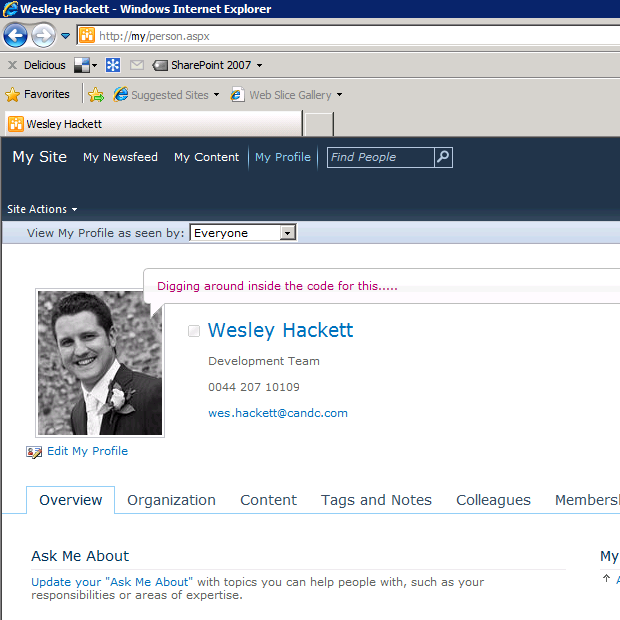
So you can see in the OOB MySite the GlobalNavigation control displays the menu, welcome control and help icon. In the picture below the global navigation control is the darkest area at the top.

Understanding the OOB
Before we create our own control lets examine the OOB one further so we understand what it’s giving us. As you read in the last article both the MySite host and personal site definitions activate a web scoped feature called ‘MySiteNavigation’. This is the feature we’ll be taking a closer look at.
The feature ‘My Site Navigation’ {6ADFF05C-D581-4c05-A6B9-920F15EC6FD9} is located in {SharePointRoot}\TEMPLATE\FEATURES\MySiteNavigation\Feature.xml.
The contents of the feature definition are as follows:
<Feature Id="6ADFF05C-D581-4c05-A6B9-920F15EC6FD9"
Title="$Resources:spscore,PeopleFeatures_MySiteNavigation_Text;"
Description="$Resources:spscore,PeopleFeatures_MySiteNavigation_Desc;"
Version="14.0.0.0"
Hidden="TRUE"
Scope="Web"
ReceiverAssembly="Microsoft.SharePoint.Portal, Version=14.0.0.0, Culture=neutral, PublicKeyToken=71e9bce111e9429c"
ReceiverClass="Microsoft.SharePoint.Portal.UserProfiles.MySiteNavigationFeatureReceiver"
xmlns="http://schemas.microsoft.com/sharepoint/">
<ElementManifests>
<ElementManifest Location="mysitenavigationfeatureelements.xml"/>
</ElementManifests>
</Feature>
The feature references an ‘ElementManifest’ and ‘FeatureReceiver’. Lets look at the work the ‘FeatureReceiver’ does first. The class responsible is the ‘MySiteNavigationFeatureReceiver’. On activation it simply sets a property on the SPWeb object. As below:
SPWeb parent = properties.Feature.Parent as SPWeb;
if (parent != null)
{
parent.AllProperties["AllowSubwebsOnTopNavigation"] = true.ToString();
parent.Update();
}
On deactivation it removes this property. As below:
SPWeb parent = properties.Feature.Parent as SPWeb;
if ((parent != null) && parent.AllProperties.ContainsKey("AllowSubwebsOnTopNavigation"))
{
parent.AllProperties.Remove("AllowSubwebsOnTopNavigation");
parent.Update();
}
The ‘ElementManaifest’ content is as follow:
<Elements xmlns="http://schemas.microsoft.com/sharepoint/">
<Control Id="GlobalNavigation"
Sequence="100"
ControlSrc="~/_controltemplates/mysitetopnavigation.ascx" />
</Elements>
As you can see it is creating a ‘Delegatecontrol’ pointing to an ascx file in the controltemplates folder and has a sequence number of 100. The full path to the ascx is {SharePointRoot}\TEMPLATE\CONTROLTEMPLATES\MySiteTopNavigation.ascx.
Custom delegate control
So to customise the global navigation we need at least two things. The first is a new ‘DelegateControl’ feature with a lower sequence than 100 to deploy our custom control, the second is the control itself.
There is a decision to make about how to create a custom control. You can create a new ascx control and nest the OOB control inside it. This is most appropriate if you’re only planning on subtle changes above or below the OOB control. The other option is to copy the OOB control ascx contents into a new ascx and make the required changes there. This would be most appropriate if you plan to heavily customise the visual or functionality. For the purpose of this article we’ll go with the nested approach for simplicity.
I’d recommend installing CKSDev Visual Studio extensions to speed up your development here ![]() but then I’m part of the project team so have a slight bias
but then I’m part of the project team so have a slight bias ![]() I’m going to describe this process using CKSDev but the OOB tooling will support the same process just with a few more steps.
I’m going to describe this process using CKSDev but the OOB tooling will support the same process just with a few more steps.
- Create new SharePoint project.
- Create the project as a Farm solution as we need to push a asmx onto the SharePointRoot.
- Add a new UserControl to the project. This will be the control displayed in the delegate. The project will now look something like this:

- Open up the ascx and add a temporary block of html such as a <p>Hello World</p> tag. We’ll do this to check the wiring before going to the effort of changing the control. In case you don’t know, if a ‘DelegateControl’ throws an error nothing with show in the UI. So a good technique is to wired up the control and test it first without any of the added complexity to ensure its working. This could save you of stress hours

- Next lets create the ‘DelegateControl’, CKSDev provides a SPI for this but you can use an empty OOB element to achieve the same results.

- Enter the following properties

- We don’t need any properties for the control so click finish without any changes on the second page.
- Rename the Feature1 to something more sensible and set the properties

- Deploy the project to the MySite and you’ll see that instead of the OOB navigation we now get ‘Hello World’ as you can see below

- We can now be confident that our feature, delegate control and ascx are all hooked together and work.
- So back to the ascx file to add the banner and OOB navigation control.
- Add the banner image into the project, you can choose where you store it but for simplicity I’ve chosen the SharePointRoot images folder.
- Add the required markup to the ascx file, for example something like the following
<%@ Register TagPrefix="wssuc" TagName="MySiteTopNavigation"
src="~/_controltemplates/MySiteTopNavigation.ascx" %>
<style type="text/css">
.TopBody {
background-color: #21344A;
}
</style>
<div class="TopBody">
<img src="_layouts/images/custommysite/spsuk.png" alt="Our Banner" />
</div>
<wssuc:MySiteTopNavigation ID="OOBNav" runat="server"/> -
The project will now look something like this

- Redeploy the updates and you should see the changes as below


There you have it, custom global navigation and we’ve been nowhere near the masterpage.
Masterpage and CSS
I’m not that great at CSS and front end development in general and will defer any in depth example or advice on the finer points to people I consider the experts:
- Randy Drisgill – Randy Drisgill – SharePoint Branding and Design
- Heather Solomon – Heather Solomon – SharePoint 2007 Branding
- Sam Dolan aka PinkPetrol – PinkPetrol – A dash of design since 1999
In high level terms you can build and apply custom masterpage and CSS in the same way you can with any other SharePoint site.
Custom theme
SharePoint 2010 provides a new way to change some of the colours within the site. The old Theme mechanism was a little bit tricky but the new one runs off the PowerPoint theme files. This gives the end user to put a little bit of there own styling choice into their site without the need for development, SPD access. Each site contains over 15 themes to choose from and they are stored within the theme gallery.
The user can change the theme by browsing to the ‘Site Settings’ page and under ‘Look and Feel’ selecting ‘site Theme’. The following page then allows the user to select a different theme and apply it to their personal MySite.

After applying the theme the site will now have a new scheme applied for example the above selection changes the personal site to look like this

Creating a custom theme
So if the OOB themes aren’t to your liking how about creating a custom one. Well in order to create a new custom theme you need to have access to PowerPoint 2010.
So lets create a custom theme and apply it to the site using a feature. We’ll start from an existing theme file for simplicity, but you can create one from scratch as well.
- Using the Visual Studio Server Explorer browse your site and locate the ‘Theme gallery’ node.
- Select a theme we’ll use as the base and right click.
- From the context menu select ‘Export this theme’, choose a save location and save the file.
- Open it in PowerPoint 2010.
- Select the ‘Design’ tab on the ribbon.
- Select ‘Colors’ option.

- Change the required colours and save them. For this example I’m just going to change the background to a tasty lime green

- Select the ‘Fonts’ option.

- Make the required changes and save them.
- Final step is to save the theme file. Expand the themes ribbon section and click ‘Save current theme’.

- We now have a thmx theme file we can upload directly into our site or deploy via a feature. We’ll go with the feature deployment as manually it’s like any other file upload to a gallery
- Add a new module to the project and add the thmx file into the module.
- Append the module contents with the following
<?xml version="1.0" encoding="utf-8"?>
<Elements xmlns="http://schemas.microsoft.com/sharepoint/">
<Module Name="CustomThemeModule"
Url="_catalogs/theme"
RootWebOnly="TRUE"
Path="CustomThemeModule">
<File Type="GhostableInLibrary"
Url="CustomAzure.thmx"
IgnoreIfAlreadyExists="true" />
</Module>
</Elements> -
Add a new feature to deploy the themes.
- Your project should look something like this

- Deploy the project and your custom theme should now be available in the themes page

- Add a feature receiver to the themes feature and added the following to the code
public override void FeatureActivated(SPFeatureReceiverProperties properties)
{
SPWeb web = properties.Feature.Parent as SPWeb;
ThmxTheme.SetThemeUrlForWeb(web, "/_catalogs/theme/CustomAzure.thmx");
}public override void FeatureDeactivating(SPFeatureReceiverProperties properties)
{
SPWeb web = properties.Feature.Parent as SPWeb;
ThmxTheme.SetThemeUrlForWeb(web, "");
} -
Deploy the project and this time the theme should get auto applied, and removed on deactivation.
- So the final project looks something like this


What’s next?
Hopefully you can see how you have several options to customise the look and feel of the MySite. In the next article we’ll examine in more detail how to customise the default page.


Another great post on the My Site Wes – great stuff.
A quick question on applying a custom master page to the My Site Host site collection, which I don’t think is covered above. By default the site collection doesn’t have the Publishing features enabled and so it is not possible to apply a master page through the UI. Have you any strong opinions on if you’d go with activating Publishing, or rather create a feature to deploy/ set a custom master page (which is my preferred option)?
Cheers,
I’d base the decision on what the client required, but I would generally expect them not to want users changing the masterpage. Therefore I’d say probably go with a feature based deployment.
Thanks for the great post Wes.
I was wondering, how would I have to modify the custom ascx file (based on the original MySiteTopNavigation) if all I wanted was to change the “My Site” string at the very left of the top navigation panel to something else? I have managed to drop the Find People search field and the help icon near the logged-in user name, but I am having a hard time changing that field.
Any help would be greatly appreciated!
Thank you in advance.
Actually, I already figured that one out so nevermind, thanks anyway! I just replaced the code inside with a hand-made hyperlink, which is just what I needed 🙂
Now, I have noticed that control delegation online appears to work for the top-level sites, but not My Content for example. Is there a way to enable that? Right now I have the custom header for all of my pages on the My Sites host except for My Content. This likely has to do with the fact that it uses its own path and layout (_layouts/MySite.aspx).
Looking forward to your response!
Hi Mikel,
The ‘My Content’ is held within a MySite personal site collection. So you will need to activate the control delegate in this site collection. If you implement a staple feature to associate it with the Personal site definition this will happen automatically on personal site creation. The (_layouts/MySite.aspx) page actually does a redirect based on the logged in user to the personal site for that user.
Cheers,
Wes
Juat wonder how this becomes the default mySite. Are you changing the OOTB mechanizm?
Also, is there a way to control the way the personal sites will come out?
Part 4 covers how to add custom page as the default page.
The purpose of this series is to highlight customisation without changing any OOB files or provisioning mechanisms. Both of those would be unsupported.
Starting with step 9. I don’t see thye “Hello world” but the OOTB control is gone.
I added your HTML to it and I still see nothing.
Can you think what I am doing wrong?
If you are seeing nothing appearing and the OOB control gone it’s likely that your delegate control has an error. When controls are used within delegates and they error you will see no control. Ensure that the control will load and function when directly referenced in a page. This will check the control.
Hi Wes, you were a huge help and great instructions. Something is bugging me to no end.
At first deploy I did not see the test text I used, but I continued forward on your steps adding back in the OOB nav and re-deployed and I now see the nav bar but still no text.
So for kicks I added another OOB nav with a different ID and now there is 2 which is causing me to scratch my head, if I can keep adding controls to the custom one…. to me the custom control is working properly but something is not liking the HTML.
hi,
i want to add banner in my content page below [row] the my site , news feed, my content. please tell me how to do that.
thx
What exactly do you mean when you say “deploy solution to mysites”?
I am not seeing anything change at step 9 and wonder if I am missing something or if I have already overrode this with a feature pushed out to mysites previously which changed the nav control as in this post: http://blogs.msdn.com/b/spsocial/archive/2010/04/08/customizing-my-sites-in-microsoft-sharepoint-2010.aspx
scratch that – disabled custom nav via powershell, redeployed and still doesn’t work. But does appear in site collections of dev server, just not mysites or personal sites.
Hi Wez,
Lovely blogs!! So fun ny to see your face popping up there when I was looking at MySite stuff.
I haven’t worked much with customizing MySites and I’m trying to do heavy customisation on the default personal page. There’s a few different carousels pointing at internal shared SP lists and external RSS feeds, sometimes with both in one webpart. Do you have any advice for where I should put shared lists/personal lists (for which RSS feeds to display) in the MySite structure please? Any address’ for blogs you have read when doing your branding you think might help would be awesome.
Cheers Wez,
Dee
Anything shared is probably best hosted within the MySite Host site collection and either rolled up through search or RSS from there.
Anything specific to only that user is best held in thier personal MySite, but beware that the update and governance aspects need considerations once you start having an instance per person. For example what happens if you wanted to add a column and have 50,000 users…. these types of things are easy enough to do, but consider them while making you choice.