
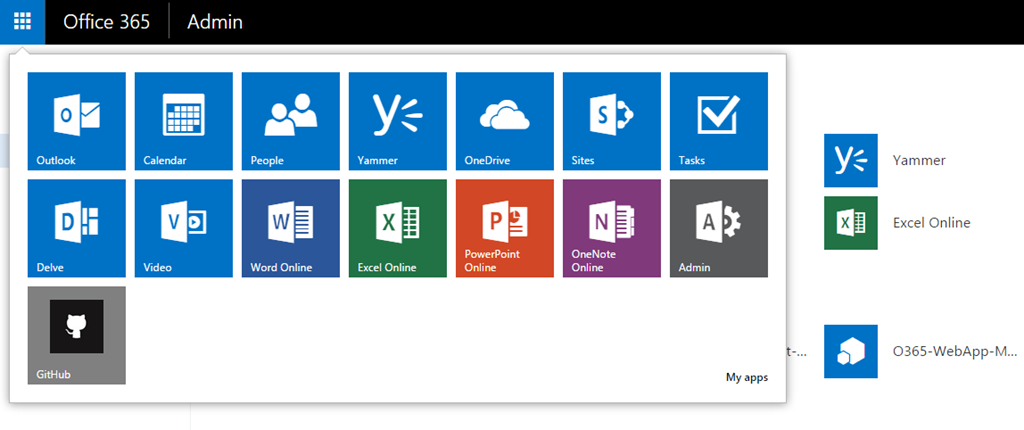
As we saw from the previous article Adding GitHub to the App Launcher the Office 365 user experience now incorporates the App Launcher as a persistent navigation element across the whole suite. Combine this with the Access Panel in Azure and you have two simple ways to provide a user with a navigation item. As you can see from the screen shot below, including last articles addition of GitHub.
Imagine an organisation wants to take advantage of the App Launcher to provide a link to their users for the company public website. On the surface this isn’t such a bonkers request. Many organisations have some elements of their internal intranet hosted within Office 365 and often they require a link to the public facing sites as well. It makes sense then as the App Launcher provides a globally available menu system that the intranet owner might ask for this link to be provisioned. Ok so far, a sensible request by the stakeholder….
Well if we cast our minds back to the types of application that can be displayed:
- Office 365 applications – If you are using Office 365 such as Exchange and SharePoint and the logged in user is assigned a license then these will appear. The user will be automatically signed in when they click any of the Office 365 apps.
- Microsoft or Third Party apps configured with Federation based SSO – If an Azure admin has configured the app with single sign-on mode set to ‘Azure AD Single Sign-On’ then when a user clicks the app they will be automatically logged in assuming they have been explicitly granted access to that application.
- Password based SSO without identity provisioning – These are applications the Azure admin has added with the single sign-on mode set to ‘Password based Single Sign-on’. It is important to realise that all users authenticated to the Azure AD will see these applications. The first time a user clicks one of these apps they will be asked to install a lightweight browser plugin for IE or Chrome. Once they restart the browser the next time they navigate to that app they will be asked to enter the username and password combination for that app. This is then securely stored in Azure AD and linked to their organisation account. The next time the user clicks that app they will be automatically signed in with the credentials they provided. Updating credentials in the third party app needs the user to update their Azure AD stored credentials from the context menu on the app tile.
- Password based SSO with identity provisioning – These are applications the Azure admin has added with the single sign-on mode set to ‘Password based Single Sign-on’ as well as identity provisioning. The first time a user clicks one of these apps they will be asked to install a lightweight browser plugin for IE or Chrome. Once they restart the browser the next time they will be automatically signed in to the application.
- Application with existing SSO solutions – These applications are configured with the sign-on mode set to ‘Existing Single Sign-on’. This options supports the existing methods of SSO such as ADFS 2.0 or whatever the third party application is using.
None of these sound like a ‘simple’ type of hyperlink navigation item do they? They all assume the need for some kind of sign-on or application.
So at the time of writing this article there is no way to add a simple static url into the icons. Microsoft might pull this feature in at some point in the future, but for now we need something sensible to help us implement it.
NB: When researching this challenge I did stumble upon one blog article which was suggesting using jQuery to inject items in the html of the App Launcher. While in reality the author had it working it would be something I’d steer well clear of for the following reasons:
- Microsoft ‘own’ the UI/UX for the App Launcher which means they can make breaking changes any time they like leaving you with a broken implementation at best
- The article could only get this to work across SharePoint Online as the author could inject the required script. This meant that users outside of SharePoint lost this set of icons in things like Exchange.
So where does that leave us? Simple really we need an application registered with our Azure Active Directory which can redirect the user.
Creating our redirection app
So we have two options for this, manually craft an Application and register it with our Azure AD Applications or use the Visual Studio tools to help. For this article we’ll opt for the Visual Studio root and rather explain what’s happening behind the scenes as we go.
So lets get going by cracking open Visual Studio 2013.
Lets create a new MVC Web Application called ‘SimpleRedirectorApp’ and click OK.


Lets be good citizens and change our app to use SSL. Change the Project property to SSL Enabled to true.

Then copy that URL into the properties page on the Web tab.

Save the project and run it.
At this point you should see the normal templated MVC page running on your localhost under SSL.

So at this stage we have a basic MVC web application up and running. Now lets switch into our Azure portal and take a look at the applications listing.
This is all the applications I have configured in the Azure Active Directory. You’ll notice from the screen shot below our new app is not yet listed in the applications and thus Azure and the App Launcher no nothing about it.

If we were doing this manually we would go through the steps to ‘Add’ the application here. For this run through we’re going to jump back to Visual Studio.
We are going to use the Office365 Tools to add a connected service which wire up our app the associated Azure AD for us.
So from the context menu of the project chose ‘Connected Service’.

Click ‘Register your app’.

Sign in with a user who is an Azure AD admin / Tenant admin which is normally one and the same.

This will then show you information about your application.

Click ‘App Properties’ and make any changes from single to multi tenant if you require.

Note that the URLs are being displayed which match where our App will run from at the moment. When you choose to publish these elsewhere for Production you update these values.
Now when this wizard finishes it has done a few things. Firstly its added a set of things to the web.config file to store the Client Id etc.

Next if we switch back to our Azure Portal you’ll see the App is now being listed.

Clicking in we can view the settings that have been made.

One of the things we can’t do from the Visual Studio tools is set the Logo for the App. This is important to do as it’s the visual icon in the App Launcher. So click the ‘Upload Logo’ from the menu bar.

Choose an image which matches the specifics in the dialog box. I’m going to be linking to my companies website so created a quick icon based on our logo.

Scrolling down you can see the URLs listed and the permissions the App needs to run. Notice at the moment we don’t ask for anything other than delegated permissions on the Azure AD to enable SSO and read the profile of the user. That’s all we need.

Once the App is configured we need to assign users to it so it shows up for them. So click the ‘Users’ tab and find the user you need to assign. As you can see from the screenshot I’m just going to assign myself it for now. Once highlighted click ‘Assign’ from the menu bar.

Now when you browse to your Office 365 tenant and open the ‘My Apps’ page you can see our new App listed. As you can see from the screen shot below.

At the moment we have to manually ‘pin’ this new app ourselves ![]() hope Microsoft add features to do this from the portal at some point.
hope Microsoft add features to do this from the portal at some point.

So now it shows up in the App Launcher. Hooray you say… click it and what happens… we get the boring old MVC default page in a new tab. (assuming you still left the app in debug, remember its localhost at the moment).

So only one more step to go. Lets make our App go where it should, to the all important public website.
Open the HomeController.cs and find the Index method.
Change it from this

To this

We changed the result object to the RedirectResult type and provide it the url of our public site.
Now rerun our localhost app and it should redirect straight to the website.

Now when we click the App from the App Launcher we get a new tab and the App handles the redirection to the specified site.
Happy stakeholder ![]()
As I mentioned earlier one of the best things about this approach is that it is truly suite wide as you can see from the screen shot of the users Calendar below.

In a more detailed scenario you might want to add more features to the redirection app and make it configurable without hard coding, but this was the basic how to ![]() .
.


Hi,
Great article. Do you have any solution to not open the application in a new tab?
Br,
Ola Grauers
Hi Ola,
As the features currently stand there is no way to navigate within the current tab. All Azure Apps registered to the tenant apps will launch into new windows.
Cheers,
Wes
Can we not just create a web application/web api type app from the UI which does the exact same thing and will not open in new tab?
Yeah, the service has improved from the time I wrote this article. You can now do this via the Azure Portal.
Theoretically, then, we could redirect to a SharePoint-hosted app instead of to an ‘external’ site. All we would need to do is set the Reply Url in Azure AD to the url of the app in the SharePoint app catalog.
Is this something you have tested?
Well you have a couple of options, you can build the add-in as an Azure app which uses the Azure AD login flow, or you could use the appredirect.aspx url from the Site contents page tile for your app.
Also if you install the SP add-in into the employees MySite Personal (OneDrive) it will already show up in their ‘MyApps’.
Hi Wes!
In my scenario I would like to Launch an current web site (ASP.Net MVC) from the Office365 Launch bar and Log in depending the 365 user (AD).
What would be the best way to do this?